
Easy Royal Icing Recipe
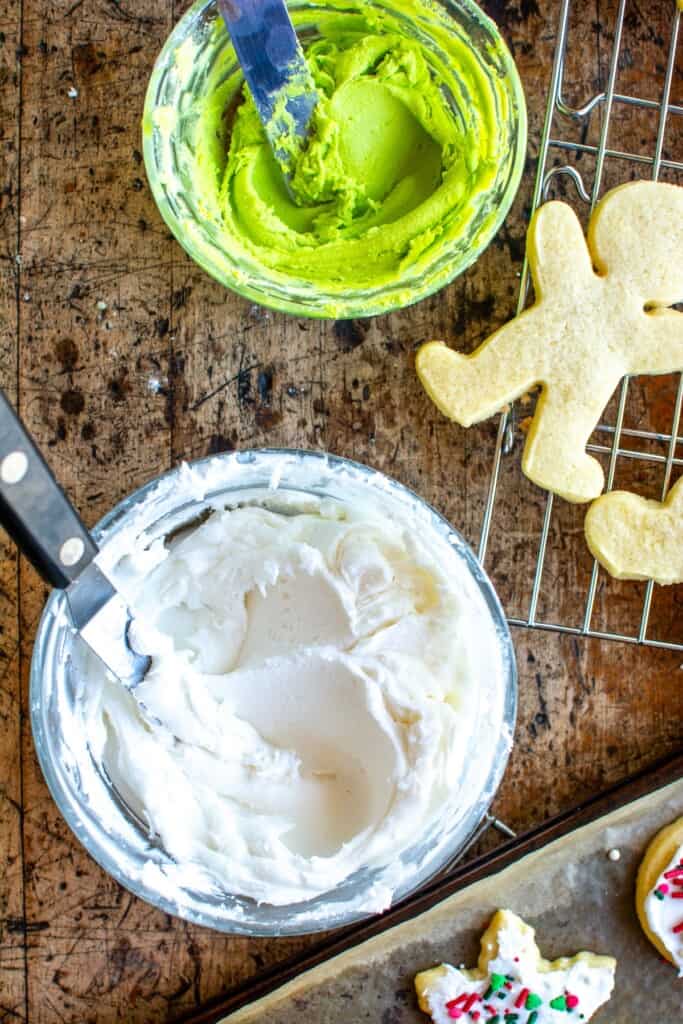
Royal icing is a smooth, sturdy icing that dries firm, making it a favorite for decorating sugar cookies, gingerbread, and other baked treats. This easy recipe uses meringue powder instead of raw egg whites and comes together with just a few simple ingredients. Use it to pipe outlines, add details, or flood cookies with a smooth layer of icing.
Ingredients
- 4 cups (about 480 grams) confectioners’ sugar, sifted if lumpy
- 3 tablespoons meringue powder
- 5 tablespoons warm water, plus more as needed
- ½ teaspoon vanilla extract, optional
Instructions
- Combine the ingredients. Add the confectioners’ sugar, meringue powder, 5 tablespoons of warm water, and vanilla, if using, to a large mixing bowl.
- Mix until smooth. Beat on low speed until the sugar is incorporated, scraping down the sides of the bowl as needed. Increase to medium speed and beat for about 5 minutes, until the icing is glossy and holds a firm peak.
- Adjust the consistency. For piping outlines or details, use the icing as is or add water a few drops at a time if it seems too thick. For flooding cookies, stir in water a little at a time until the icing flows smoothly. A ribbon of icing should settle back into the surface in about 10 to 15 seconds.
- Color and decorate. Divide the icing into bowls and tint with gel food coloring. Transfer it to piping bags or squeeze bottles and decorate completely cooled cookies.
Tips for Success
- Keep the icing covered. Royal icing dries quickly when exposed to air. Cover the bowl with plastic wrap pressed against the surface, or keep it in an airtight container between uses.
- Add water gradually. A small amount can change the consistency, so add it a few drops at a time and mix well before adding more.
- Use gel food coloring. Gel colors add strong color without thinning the icing as much as liquid food coloring can.
- Let decorated cookies dry. Allow icing to dry at room temperature until firm. Drying time varies depending on the thickness of the icing and the humidity.
How to Store Royal Icing
Store unused royal icing in an airtight container in the refrigerator for up to 3 days. Before using it again, let it come to room temperature and stir gently. If it has thickened, add a little water to restore the consistency. If liquid has separated, mix the icing until smooth.
This easy royal icing recipe is a dependable starting point for cookie decorating. Adjust the consistency to suit your design, then have fun adding colors, patterns, and personal touches to every batch.
9 Essential Tips for Perfecting Easy Royal Icing Every Time
- Use 3 tablespoons meringue powder for each 4 cups of powdered sugar.
- Add about 6 tablespoons warm water to start.
- Beat the mixture until thick, glossy peaks form.
- Sift powdered sugar to prevent lumps.
- Add water a teaspoon at a time to thin the icing.
- Use thicker icing for outlines and thinner icing for filling.
- Add gel food coloring for vibrant shades.
- Cover icing with plastic wrap to prevent it from drying out.
- Let decorated cookies dry completely before stacking.
Use 3 tablespoons meringue powder for each 4 cups of powdered sugar.
For a reliable royal icing consistency, use 3 tablespoons of meringue powder for every 4 cups of powdered sugar. This ratio helps the icing whip up smooth and glossy, while giving it enough structure to pipe decorations that hold their shape as they dry.
Add about 6 tablespoons warm water to start.
Start with about 6 tablespoons of warm water when mixing your royal icing. This gives the ingredients enough moisture to blend smoothly, while leaving room to adjust the consistency as needed. If the icing is too thick, add more water a few drops at a time; if it’s too thin, mix in a little confectioners’ sugar.
Beat the mixture until thick, glossy peaks form.
Beat the royal icing mixture until it becomes thick, smooth, and glossy, with peaks that hold their shape when you lift the beaters. This usually takes about 5 minutes on medium speed, though timing can vary. Reaching this stage gives the icing enough structure for piping borders and details; you can thin it with a few drops of water if you need a looser consistency.
Sift powdered sugar to prevent lumps.
Sifting the powdered sugar before making royal icing helps remove lumps, making the icing smoother and easier to mix, pipe, and spread. It’s a simple step that can also help prevent clogs in piping tips—especially important when decorating cookies with fine details.
Add water a teaspoon at a time to thin the icing.
When thinning royal icing, add water one teaspoon at a time and stir well after each addition. This gradual approach gives you better control over the consistency and helps prevent the icing from becoming too runny. Stop when it flows smoothly enough for your decorating technique.
Use thicker icing for outlines and thinner icing for filling.
Use thicker royal icing to pipe clean outlines that keep the design in place, then thin a separate portion with a little water to fill in the center smoothly. The thicker icing acts like a border, while the thinner icing spreads easily inside it. Add water gradually until the filling icing flows but doesn’t run over the edges.
Add gel food coloring for vibrant shades.
Add gel food coloring to royal icing for vibrant shades without making it too thin. Start with a tiny amount, mix well, and add more gradually until you reach the color you want. Keep in mind that the color may deepen as the icing rests, so let it sit for a few minutes before making final adjustments.
Cover icing with plastic wrap to prevent it from drying out.
Royal icing dries quickly when exposed to air, so cover it with plastic wrap whenever you’re not using it. Press the wrap directly onto the surface of the icing to help prevent a dry crust from forming. If you’re working with several colors, cover each bowl separately and keep piping bags sealed between uses.
Let decorated cookies dry completely before stacking.
Let decorated cookies dry completely before stacking them to help protect your designs from smudging, dents, or sticking together. Royal icing may feel dry on the surface before it has fully hardened, so give the cookies plenty of time—often several hours or overnight, depending on the icing thickness and humidity. Once the icing is firm to the touch, stack the cookies carefully with parchment paper between layers.
Tags: airtight container, confectioners sugar, cookie decorating, decorating tips, easy royal icing recipe, flooding cookies, gel food coloring, gingerbread, glossy peaks, icing consistency, icing storage, meringue powder, piping bags, piping icing, powdered sugar, royal icing recipe, sugar cookies, vanilla extract, warm water